GROWING MANAGEMENT OF COMMERCIAL PULLETS
Productive and profitable layers begin with good quality pullets. Having the correct body weight and body type at the start of egg production will enable pullets to achieve their genetic potential. Problems that develop during the growing period cannot be corrected after egg production begins.
HOUSE PREPARATION
The brooder house should be cleaned and disinfected well in advance of chick delivery. A minimum of 3 weeks “down-time” between flocks should be scheduled for house preparation. Before cleaning and disinfection, all manure and feed should be removed, and a rodent control program implemented (or preferably the ongoing program should be continued). This is the time to make necessary repairs to the house and equipment. The house should be cleaned with a high-pressure wet wash with detergent to remove all organic matter. Washing should move from the ceiling downwards through the cages or system equipment to the floor and finally, manure pit. After thorough cleaning, the house should be sprayed or foamed with an approved disinfectant. Increasing the temperature inside the house will improve the effectiveness of the disinfectant. Additionally, fumigating the house within 5 days of chick delivery will help ensure sanitary conditions. The effectiveness of the cleaning, disinfection and fumigation should be checked by environmental testing of the house surfaces for coliform and Salmonella bacteria.
Day—– Management Schedule———
-21 days • Remove old feed and manure • Clean and disinfect the growing house • Rodent control program • Make repairs to equipment (broken drinkers, perches etc.) • Wet wash and disinfect grower house
-5 days • Fumigate growing house •Verify cleanliness by bacterial culture of environment
-2 days • Start brooders in cool and cold climates • Clean and disinfect water system •
Place paper inside cages
-1 day • Start brooders in hot climates • • Minimum humidity of 40% • Set lights for 22–23 hours of light @ 30 lux • Fill feeders to their highest level with fresh starter feed • Adjust feed guards • Adjust drinkers to proper level •Flush water lines and check that all drinkers are working
+1 day • Fill cup drinkers or let nipple drinkers drip to stimulate water consumption • Add vitamins and electrolytes to drinking water • Place starter feed inside cage on cage paper (in front of feeders)
BEFORE CHICKS ARRIVE
The house preparation should be completed 48 hours before delivery of the chicks. Allow enough time for the temperature of the air and equipment in the house to be brought to the proper brooding temperature. Be aware that air temperature rises faster than the temperature of concrete floors, litter, system equipment and water in the house. Set the light clocks to 22–23 hours of light at 30 lux of intensity. Lights in the red-orange wavelength (warm fluorescent) are appropriate for growing and laying birds. An intermittent lighting program for chicks should be considered. Use a well -balanced light (3500K) or a cool light in growing bird.
Feeders should be filled to the highest level with fresh, good quality starter crumble. Adjust the feed guards to allow chicks to access feeders from day one. Ensure that all drinkers are working properly. Adjust the drinkers to the proper height to facilitate drinking by the newly arrived chicks. The birds’ drinking water should contain vitamins and electrolytes to replace losses during delivery. Feed should be placed on the cage paper before chick arrival or immediately after they are placed in the cages. Chicks brooded on the floor should be provided extra feed trays or be fed off cardboard.
CHICK QUALITY – IN THE BEGINNING————
layer pullet chicks must be sourced from breeder flocks that are healthy and free of verticallytransmitted diseases important for bird and human health. Chicks should possess adequate levels of maternally-derived antibodies for early protection against challenges of infectious bursal disease (Gumboro, IBD), Newcastle disease, infectious bronchitis and other diseases. The chick should be of adequate body weight with a well-healed navel (umbilicus) and free of physical defects. All chicks should be vaccinated against Marek’s disease in the hatchery using the Rispens +HVT or in low challenge areas with HVT and SB-1 strains. IIn the hatchery, other vaccinations can be administered by using HVT-vectored vaccines containing infectious laryngotracheitis (ILT) or IBD (Gumboro) protective genes. If HVTvectored vaccines are used, do not combine with another HVT strain vaccine, although Rispens or SB-1 may be used in combination. Chicks may also receive an infrared beak treatment in the hatchery. The transportation time of the chick delivery from hatchery to farm should be kept to a minimum. Chicks derived from different breeder flocks should be kept separate and mortality records maintained for each breeder source.
BROODING PERIOD – GETTING OFF TO A GOOD START
Pullet chicks arriving to the farm from the hatchery should be alert and active. Chicks must be vigorous enough to explore their new environment and quickly find feed and water. Eating feed and drinking water quickly will speed the development of healthy intestinal microflora and build resistance to enteric pathogens such as Salmonella and E. coli. During the first week of life, chicks must be provided with constant attention by the manager to ensure optimized temperature, humidity, lights, feed and water availability. The first 2 weeks of life are when the most significant problems for proper chick development can occur. The newly hatched chick is unable to regulate body temperature and must be provided the proper environmental conditions. Relative humidity during the first week should be above 40% to prevent dehydration, drying of mucus membranes and Brooding chicks in cages requires strict management of temperature and humidity as the chicks cannot migrate to an area of comfort like chicks grown on the floor. Chicks started in cages should be placed on paper for 7 to 10 days to help their movement within the cage, temperature control, prevent drafts and allow supplemental feeding on the paper. Feed should be placed in front of the feed trough to train chicks to move towards the permanent feeders. During the first week, chicks benefit from bright light conditions in the house. Minimum light intensity should be 30 lux with clocks set to 22 to 23 hours. Alternatively, if local regulations allow, an intermittent lighting program can be used (4 hours of light followed by 2 hours of darkness, repeated for the first 7 to 10 days). In order to encourage water consumption, keep cup drinkers full of water for the first 3 days or adjust water pressure to cause a hanging drop of water in nipple drinkers. Chicks that fail to adapt to their environment and are delayed in finding feed and water will die at 4 or 5 days of age when the yolk sac is depleted. Chicks raised on the floor in houses heated with brooder stoves or whole-house heating should be confined in brooder rings. Observe chick behavior to determine if the temperature is correct. Chicks should be uniformly distributed in the brooding area. Closely grouped chicks indicate low temperatures or excessive drafts. In cold environments chicks will often chirp with a distressed tone. Chicks that are too warm will appear lethargic and will try to move away from the heat source. Both heat and cold-distressed chicks can have pasty vents.
ADDITIONAL CONSIDERATIONS FOR FLOOR-RAISED BIRDS
Floor-raised pullets may use pan or chain feeders. For both feed systems, it is important to start chicks by feeding on paper, cardboard, or trays that are placed near the feed line. When the chicks first arrive, be sure either the pans or troughs are completely filled to help the chicks find the permanent feed source. Carefully monitor the control panel to ensure that all feeders on the line remain full. When using brooder rings, there may not be sufficient access to water. Provide supplemental water with chick drinkers for the first week or two, or until the rings are opened up to full water access. If perches are integrated onto the feed or water lines, it is important to minimize manure build up. Water lines with perches should use small or no-drip cups, as large drip cups tend to collect manure from perching birds. Many diseases affect floor-raised birds more than cage-raised birds. In particular, infectious bursal disease and coccidiosis must be well controlled to ensure good uniformity and weight gain. Veterinarians with knowledge of the local disease burden should be consulted to implement an appropriate control program.
TEACH GOOD BEHAVIOR EARLY
Pullets going into enriched colony, barn or aviary laying environments should be provided growing environments containing perches, water platforms or multi-tiered environments. While chicks are usually started on the floor, it is important to set up the platforms or enriched environment by 3-4 weeks of age. If water platforms are used, it is important that pullets continue to have access to water on the floor until the flock learns to jump. Complex environments teach pullets jumping and exploratory behaviors. Pullets raised in enriched growing environments adapt better to complex laying environments. By learning to jump and explore at an early age, adult behavioral problems such as piling or not utilizing all levels in a multi-tiered system can be reduced. Human contact during the growing period socializes pullets and reduces stress. Walking the house perimeter multiple times daily during the growing period aids socialization and can improve nesting behavior in layers. Using the same type of drinkers in pullet and layer houses improves adaptation in the layer house.
PULLET DEVELOPMENT AND WEIGHT
The pullet develops according to a wellorchestrated sequence of physiologic events. Pullets reaching or exceeding breed body weight targets during these developmental phases have the best chance to perform to genetic potential as layers. Interrupted growth during any of these developmental phases will result in hens lacking the body reserves and organ function to sustain high production as adult layers.
The growing period can be divided into the following periods:
0 TO 6 WEEKS OF AGE
During this period, the organs of the digestive tract (supply organs) and the immune system undergo much of their development. Problems during this period could have permanent negative effects on the function of these systems. Birds stressed during this period might have lifelong disability in digestion and the absorption of feed nutrients. Immunosuppression could also result from problems during this period leaving the bird more susceptible to disease and less responsive to vaccinations.
6 TO 12 WEEKS OF AGE
This period of rapid growth is when the pullet attains most of the adult structural components (muscles, bones and feathers). Poor growth during this period will prevent the pullet from attaining sufficient bone and muscle reserves needed to sustain a high level of egg production and maintain good shell quality. The skeleton is 95% developed by the end of the 13th week of life. At this time the growth plates of the long bones calcify and no further increases in bone size can occur. Any compensatory growth occurring after this period will not increase the size of the skeleton. The amount of mineral reserve available for egg shell formation is directly related to the hen’s skeleton size. Reactive vaccinations, beak trimming, bird handling and other stressful management practices can delay development during this period of rapid growth.
12 TO 18 WEEKS OF AGE
During this period the growth rate slows and the reproductive tract matures and prepares for egg production. Development of muscle continues and proliferation of fat cells occurs in this period. Excessive body weight gain during this period can result in pullets with an excessive amount of fat pad. Low body weights and stressful events during this time can delay the onset of egg production. Seven to ten days prior to the oviposition of the first egg the medullary bone within the cavities of long bones can be increased by feeding a pre-lay ration with increased levels of calcium.
BODY WEIGHT UNIFORMITY
Uniformity of body weights within a flock is as important as achieving the target average body weight. 85% uniformity is the goal during the growing period (85% of the individual bird weights are within 10% of the average). Poor pullet body weight uniformity complicates the proper feeding of the flock both in grow and lay. Another challenge resulting from poor uniformity is pullets coming into production at different times, with underweight hens producing small eggs. Reasons for pullet poor uniformity include: 1. Enteric diseases such as coccidiosis, infectious bursal disease (Gumboro, IBD), spirochetosis, viral or bacterial enteritis, runting/stunting 2. Overcrowding leading to competition at feeders and drinkers 3. Inadequate nutrition because feed formulation does not match actual feed intake
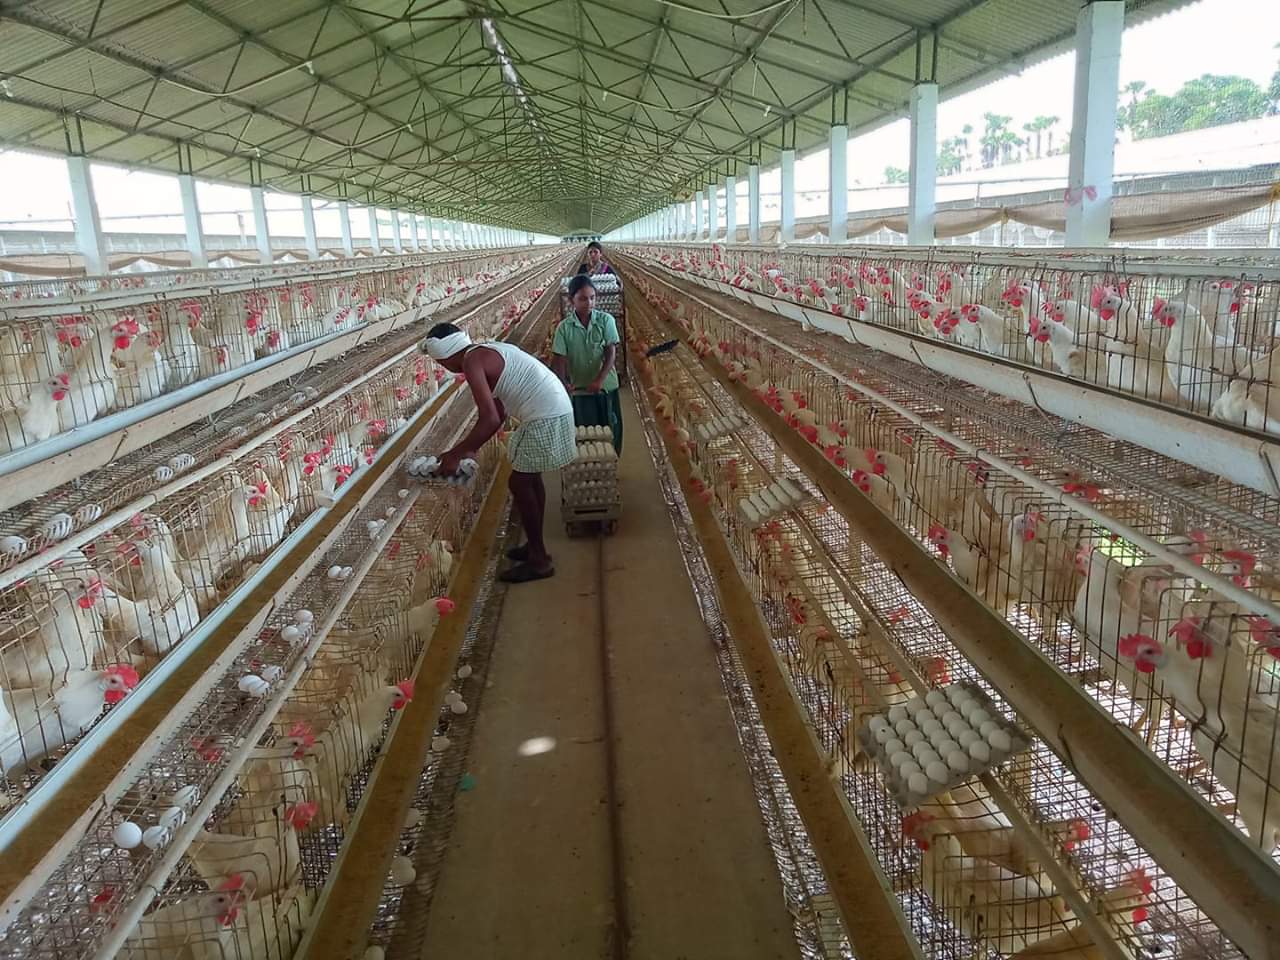
4. Feed refusal due to poor quality, mycotoxins or abrupt changes in feed ingredients disrupting intestinal microflora 5. Feed management a. Not enough feedings or stimulations b. Slow movement of feeders leading to selective feeding c. Not allowing the feeder to be emptied daily, leading to accumulation of fine feed 6. Stress from vaccination, excessive bird handling, heat stress 7. Poor beak trimming technique 8. Any restriction of water consumption will also reduce feed intake. Water must be freely available at all times. Causes of water intake problems include: a. Overcrowding or equipment failure b. Improper height of drinkers In flocks with poor uniformity it may be necessary to segregate the birds by weight and then feed separately. Birds on the floor can be separated into pens of different weight classes. When the birds cannot be separated, the flock should be fed according to the requirements of the lighter birds in the flock. A weight monitoring program should begin when the flock is 1 week old. During the first 4 weeks when the birds are still small, bulk weigh random samples of 20 birds. After 4 weeks of age, individual bird body weights should taken weekly from at least 100 birds. Continue weighing weekly until mature body size is reached at 32 weeks, then at least every 2 weeks during the remainder of the production period. For pullet flocks raised in cages, a selection of cages from all levels and positions within the house should be marked. All the birds in these cages should be weighed separately with the birds from the same cages weighed every week. Select cages at the beginning and end of feed lines, as well as from upper and lower levels. Flocks raised on the floor can only be weighed randomly, but can be collected from several different locations. Platform scales can be used to continuously monitor growth, in addition to manual weighing. Weekly monitoring of body weights is preferable as the producer can identify growth problems quickly. It might be possible to associate the growth problem with a change of feed or a stressful management practice, allowing corrective action to be taken.
RANDOM SAMPLING
Weigh birds prior to a scheduled change in feed formulation, such as from starter to grower feed. Scheduled changes in feed formulations should always be based on achieving target body weights and not the age of the flock. Underweight pullet flocks or flocks with poor uniformity should be retained on the more nutrient rich formulation. Flocks that will be receiving a harsh vaccination involving handling the birds for injection should be placed back on more concentrated feed formulations to compensate for loss of appetite.
BREAST MUSCLE DEVELOPMENT
Pullets should be examined for breast muscle development as a good indicator of proper pullet development and a predictor of future layer productivity. Muscle contains glycogen, a rapidly available source of energy used for egg production. Pullets coming into egg production with insufficient muscle will not have sufficient energy available to sustain high egg production.
LIGHTING PROGRAMS
Step-down lighting programs promote growth, determine age of sexual maturity and affect egg size and egg mass (within the genetic limits of the layer variety). In a typical step-down lighting program, the hours of light are gradually decreased over the first 12 weeks. This provides the young growing flock additional hours of feeding time to promote growth. Age of sexual maturity and egg size is not affected if the step-down period is 12 weeks or less. When the step-down period is extended beyond 12 weeks the age, sexual maturity will be delayed and egg size increases. Step-down periods longer than 12 weeks are appropriate in commercial egg markets requiring large eggs or in breeder flocks requiring larger egg weights for hatching. In open housing, the artificial lighting programs must complement the natural day length. After the initial step-down in lights over the first 12 weeks, the artificial lights are set to the longest natural daylength the flock will experience during the growing period. This will negate the influence that changes in natural daylength would have on pullet development and the age of first egg.
Careful attention to the principles of pullet management is fundamental for success and profits in laying flocks. Growing a pullet flock of the correct weight and body conformation will usually ensure success in the laying period. Problems such as low egg numbers and poor egg shell quality during lay can often be traced back to problems occurring in the growing period.


